
Transform Your Outdoor Space: The Ultimate Guide To Deck Restoration
A well-maintained deck is more than just an outdoor space; it’s an extension of your living area, a place for relaxation, entertainment, and creating memories. Over time, exposure to the elements can cause even the sturdiest decks to show signs of wear and tear. Deck restoration involves revitalizing worn or weathered decks, enhancing their appearance and longevity through processes like cleaning, repairing, sanding, and refinishing. This guide will take you through the essential steps to transform your deck into a rejuvenated outdoor haven.
Assessment and Planning
Before diving into the restoration process, start with a thorough assessment of your deck’s current condition. Look for signs of damage such as splintered wood, loose boards, rusted nails, and signs of mold or mildew. This initial inspection will help you determine the extent of repairs needed and the materials required.
Next, plan your restoration project. Decide on the overall look you want to achieve, whether it’s restoring the natural wood finish, changing the color, or updating the style. Consider the climate in your area, as this will influence the type of materials and finishes you choose.
Cleaning and Preparation
Proper preparation is crucial for a successful restoration. Start by removing all furniture, plants, and decor from the deck. Use a stiff-bristle brush and a deck cleaner to scrub away dirt, grime, and mildew. For tougher stains or mold, a mixture of water and bleach can be effective. Always wear protective gear and follow safety guidelines when using chemicals.
Once the deck is clean, allow it to dry completely before proceeding. This step is vital as it ensures that the wood is ready to absorb any treatments or finishes applied later.
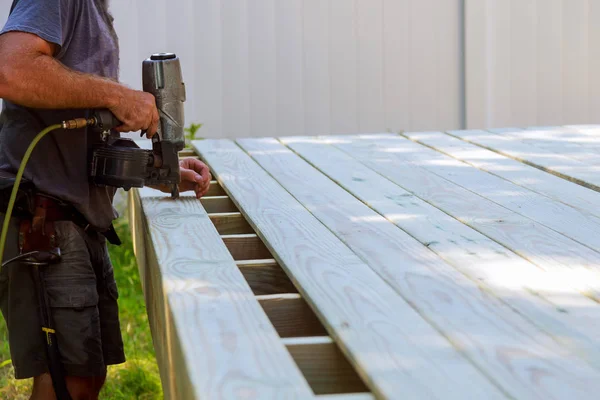
Repairing and Sanding
After cleaning, inspect the deck for any damaged areas that need repair. Replace any rotting or severely damaged boards, and secure loose nails or screws. For minor surface imperfections, sanding is an effective solution. Sanding smooths out rough spots, removes old stains or paint, and opens up the wood grain, which helps with the absorption of new finishes.
Use a power sander for larger areas, and hand sand intricate sections. Start with a coarse grit sandpaper to remove rough areas, then finish with a finer grit for a smooth surface. Remember to sand in the direction of the wood grain to avoid scratching the surface.
Choosing the Right Finish
The choice of finish depends on the desired look and the level of protection needed. There are three main types of finishes: clear sealers, semi-transparent stains, and solid stains.
Clear Sealers:
These treatments offer subtle color enhancement while showcasing the inherent beauty of the wood. They also deliver fundamental protection against moisture and ultraviolet radiation.
Semi-Transparent Stains:
These products impart a subtle hue to the wood while effectively highlighting its natural grain. They provide superior protection compared to transparent sealants, making them particularly suitable for areas with heavy foot traffic.
Solid Stains:
These options provide extensive coverage, completely altering the deck's color. While they offer superior protection from environmental factors, they do conceal the natural wood grain.

When choosing a finish, consider the level of maintenance you’re willing to commit to. Clear sealers and semi-transparent stains require more frequent reapplication, while solid stains offer longer-lasting protection.
Application of the Finish
Before applying any finish, ensure the deck is completely dry. Follow the manufacturer’s instructions regarding application techniques and weather conditions. Generally, it's best to apply the finish on a dry day with moderate temperatures and no direct sunlight, which can cause the finish to dry too quickly and not penetrate the wood properly.
Use a brush, roller, or sprayer to apply the finish, depending on the product and your preference. Start with the railings and other vertical surfaces, then move on to the deck boards. Apply in thin, even coats, and avoid over-application, which can lead to peeling or uneven drying.
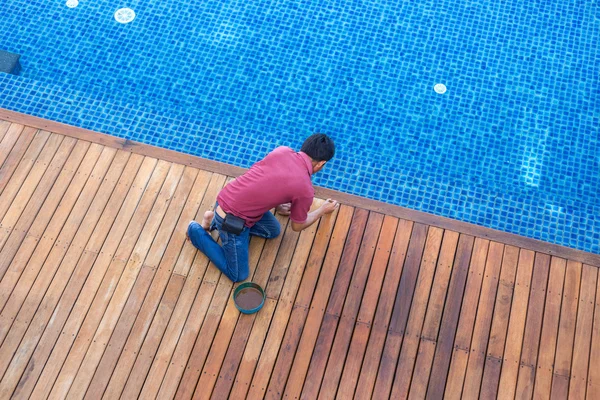
Maintenance Tips for Longevity
Once your deck is restored, regular maintenance is key to preserving its beauty and durability. Here are some tips to keep your deck looking its best:
- Regular Cleaning: Sweep the deck regularly to remove debris, which can trap moisture and cause decay. Clean the surface with a mild detergent and water to prevent dirt buildup.
- Inspect Annually: Check for signs of wear, such as loose boards, nails, or screws. Address any issues promptly to prevent further damage.
- Reapply Finish: Depending on the type of finish used, reapply every 1-3 years. This helps maintain the deck's appearance and provides ongoing protection against the elements.
- Protect from Furniture Damage: Use furniture pads to prevent scratches and dents from outdoor furniture. Also, consider using outdoor rugs to protect high-traffic areas.
- Manage Moisture: Ensure proper drainage around the deck to prevent water pooling. Trim nearby plants and shrubs to allow for air circulation, which helps keep the deck dry and reduces the risk of mold and mildew.
Enhancing Your Restored Deck
Once the restoration is complete, enhance your outdoor space with thoughtful decor and landscaping. Add comfortable seating, planters with vibrant flowers, and outdoor lighting to create a welcoming atmosphere. Consider installing features like a pergola or shade sail for added comfort and aesthetic appeal.
Hawthorn VIC, Australia
Phone: 180-0332-525